How to setup Joomla
- Igor Kozhukhov(dilos)
- Denis Kozadaev
Here we will install joomla CMS with mariadb database. Firstly we need to install packages for basic software:
root@joomla:~# apt install apache2 mariadb-server libapache2-mod-php php-xml php-mysql php-zip unzip
Now we need to create a new database from our site, let's start the database server:
root@joomla:~# svcs mariadb
STATE          STIME    FMRI
disabled       12:32:34 svc:/database/mariadb:default
root@joomla:~# svcadm enable mariadb
root@joomla:~# svcs mariadb
STATE          STIME    FMRI
online         12:35:20 svc:/database/mariadb:default
Well, it works now, let's create a new database for the CMS:
root@joomla:~# mysql
Welcome to the MariaDB monitor.  Commands end with ; or \g.
Your MariaDB connection id is 4
Server version: 10.1.23-MariaDB-2 DilOS n/a

Copyright (c) 2000, 2017, Oracle, MariaDB Corporation Ab and others.

Type 'help;' or '\h' for help. Type '\c' to clear the current input statement.

MariaDB [(none)]> create database joomla;
Query OK, 1 row affected (0.00 sec)
The database has created but we need a user (for security reason) that will be used to access the database, let's create it too:
MariaDB [(none)]> create user 'joomla'@'localhost' identified by 'VerySecretPassword';
Query OK, 0 rows affected (0.00 sec)
"joomla" is the username and "localhost" is the allowed hostname to access the database server, let's restrict the access of the account to the only created database (for security reason):
MariaDB [(none)]> grant all on joomla.* to 'joomla'@'localhost';
Query OK, 0 rows affected (0.00 sec)
"joomla.*" is the database object (database.table, * means all tables in the database). We granted full access to the database.Let's test it:
root@joomla:~# mysql -u joomla -p joomla
Enter password:
Welcome to the MariaDB monitor.  Commands end with ; or \g.
Your MariaDB connection id is 7
Server version: 10.1.23-MariaDB-2 DilOS n/a

Copyright (c) 2000, 2017, Oracle, MariaDB Corporation Ab and others.

Type 'help;' or '\h' for help. Type '\c' to clear the current input statement.

MariaDB [joomla]> Bye
Well, done... The database works! Read MariaDB documentation for more info.
Now we need to start an HTTP server, in our example it is apache2:
root@joomla:~# svcs http
STATE          STIME    FMRI
disabled       12:32:34 svc:/network/http:apache24
root@joomla:~# svcadm enable http
root@joomla:~# svcs http
STATE          STIME    FMRI
online         13:07:09 svc:/network/http:apache24
Now the server works, you can test it , just type its address in your browser:
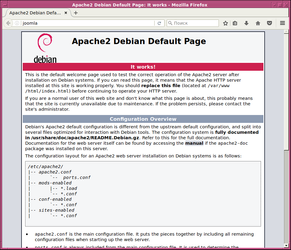
Wow, it really works! It's time to install the CMS, just download it from the site and put the archive in your server. At writing moment it was Joomla_3-7.2-Stable-Full_Package.zip (https://downloads.joomla.org/cms/joomla3/3-7-2)
Now just unpack it into the root directory of the Web server (it should be /var/www/html if you did not change it):
root@joomla:~# cd /var/www/html/
root@joomla:/var/www/html# unzip ~/Joomla_3-7.2-Stable-Full_Package.zip
/* skipped */
  inflating: tmp/index.html
  inflating: web.config.txt
root@joomla:/var/www/html#
Don't forget to change owner for the files:
root@joomla:/var/www/html# chown -R webservd:webservd .
otherwise you will not be able to write anything into the directries!
Ok, it's time to configure our CMS, let's see at its web interface, type the address in the browser again and you will see it:
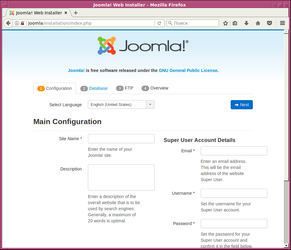
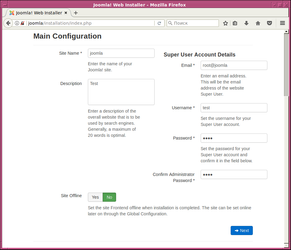
fill all the fields and click "Next" button at the bottom of the page.
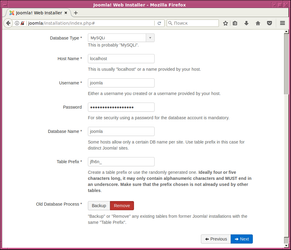
In the follow page you need to fill the database account (we have done it in a previous step)
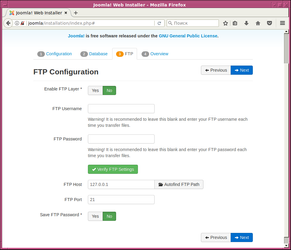
In this example we don't use FTP connection, just skip it
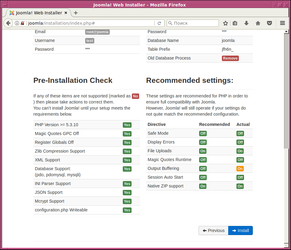
If you did all previous steps correctly, you should see this page.
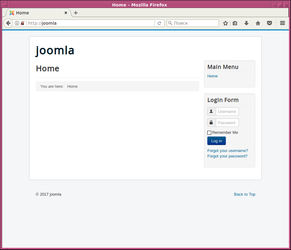
So, installation of the Joomla is completed! Let's see it (just click the "site" button)

Here's it:
That's all, good luck ![]()