How to install DilOS
DilOS is a modern platform that is based on illumos project. As other systems based on this project, DilOS has many features which are available in different systems. For example, all these systems use zfs as the primary file system to store the data, mdb to analyze kernel panics and dtrace for dynamic tracing. DilOS has it too, but we need more. And we have it! We use debian package system to manage the system and zones. Also we can start another system in virtual environments such as KVM, Xen, LX zones.
So, let's install it to a storage device, to do it you need a bootable media (ISO or USB image, whatever you prefer), or you can boot it via PXE. In this example we will install it from an ISO image.
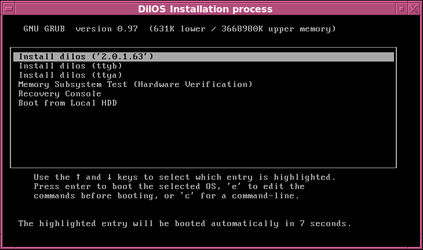
First what you will see is a boot menu of the GRUB (or loader for some previous versions):
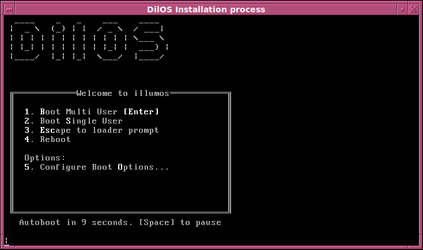
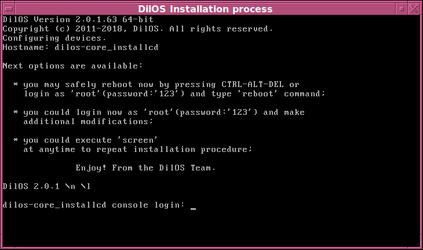
just hit the Return/Enter key. It takes some time to complete because the system loads into the memory completely and works from a ramdrive. In some time you will see the login prompt, type there the user root and its password 123.
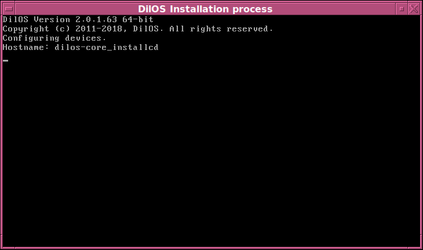
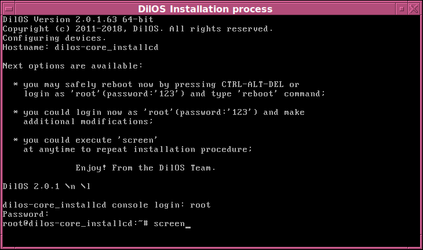
To start the installer type screen command and you will see this:
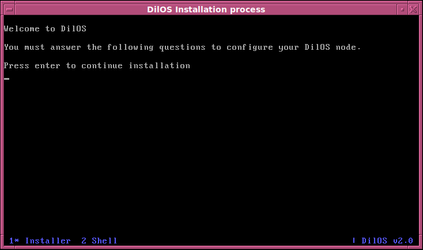
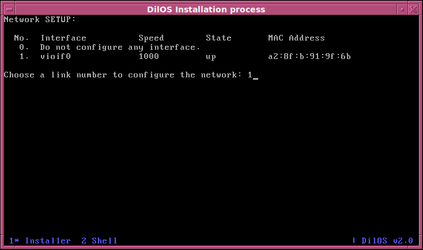
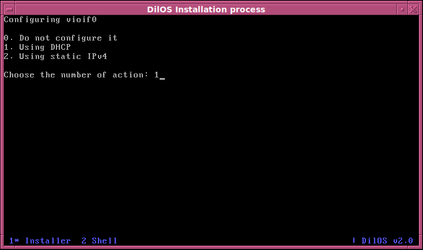
Here you can remove the media, it does not need anymore to install the system (if you used it). Just hit the Enter/Return key to continue. The system detects available network links, choose a number of link that you want to use as the primary interface of the system and hit Enter/Return key:
Now choose the configuration method (DHCP or static IPv4), in this example we used dhcp:
In some cases (on a big storage platforms, for example) we need to change MTU (Maximum Transmission Unit), in this screen you can do it:

Don't change it if you don't know what you are doing! Just skip this step.
In this screen you can enter a new value of MTU. The system shows you valid interval of this property, type a number and hit the Enter/Return.
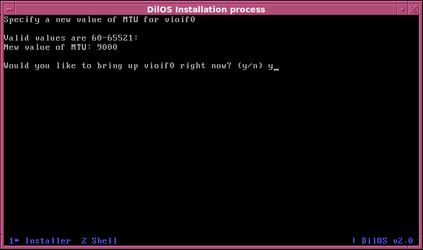
After you entered all network data the system asks you to bring up the interface. What for? Well, you may use it to log in via ssh, for example.
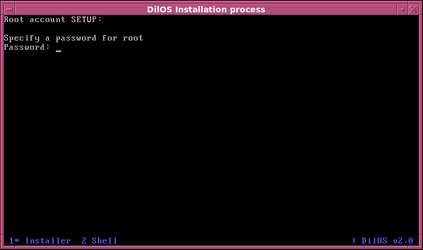
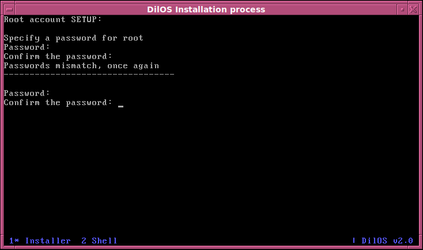
It's time for first important step of the installation: root password.
Root is the system administrator, this user can do everything, install/update/remove packages, edit configuration files and many other actions. Be careful using this account and don't forget the password!
Think before enter it... Don't panic, it's ok, you will not see the input by the security reason (it's not your cannabis as you would guess)
And once again to confirm it:
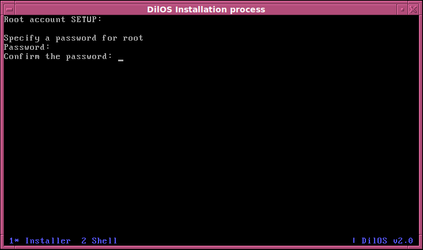
Don't worry if you mistyped, the system will reask you.
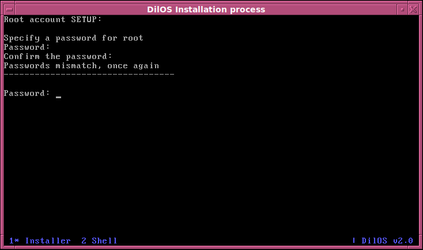
Damn, I did it, well, let's do it once again...
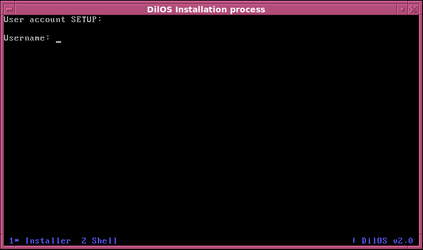
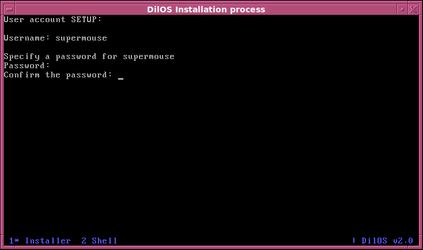
If you did it twice correctly you will see next step. And it is your account, enter here your login name:
And the password (twice like for the root account):
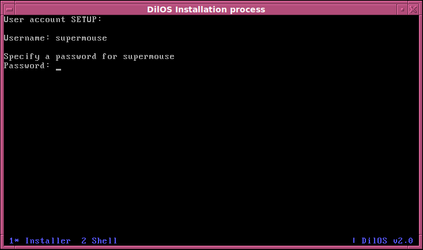
I said twice, to confirm the password:
Now choose a node name. Usualy it is a host name but a host can have many IP-addresses each of them can have many names.

It could be dilos (by the system name) or choose whatever you want.

If you have some doubts you can answer "no" here and choose another
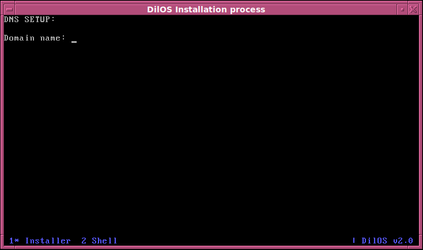
Now you need to enter your domain name.
It is an example and our domain will be example.tld
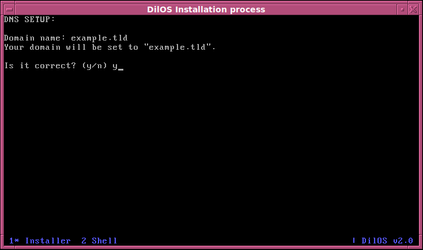
If you mistyped again answer "no" and reenter it.
Next step is the detecting of connected storage devices (hard drives)
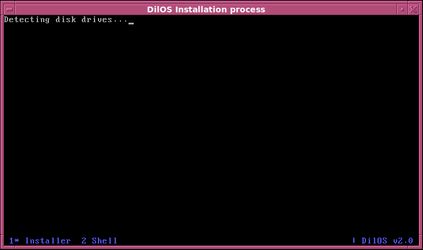
This process can take some time (depends of the speed of your computer and devices), and voilà:
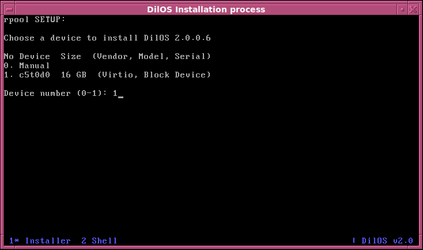
The list can be very long or it can have the only device (in our example). Just choose a device where you want to to install the system to.
Of course, if you are an expert and know what you're doing you can do it manually. Choose zero and hit Enter/Return. Create a Z-pool named rpool and come back.
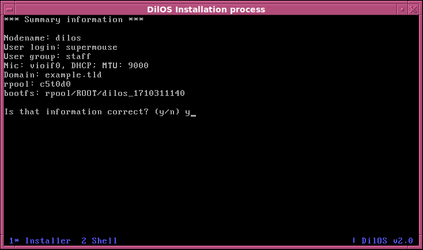
But we are using installation by default and choose 1. You will see all system info (except the passwords). Check it and answer "yes" if you are absolutely sure. It is your last chance to change some info because after this point all data on the selected disk (if you are not an expert) WILL BE LOST!
Don't be so afraid, hit Enter/Return, let the installer does it!

And many, many letters...
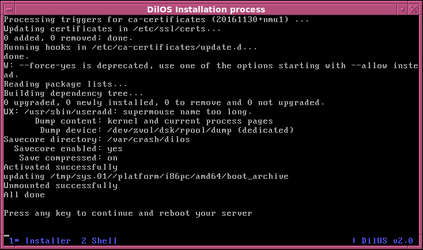
In some time, when your cup of coffee is already cold, you will see the final screen:

Our congratulations! Your data on the chosen hard drive have rewritten by our system ![]()
The latest action you can do is just hit Enter/Return to boot the system. We hope you will use it a long time for your own purpose